
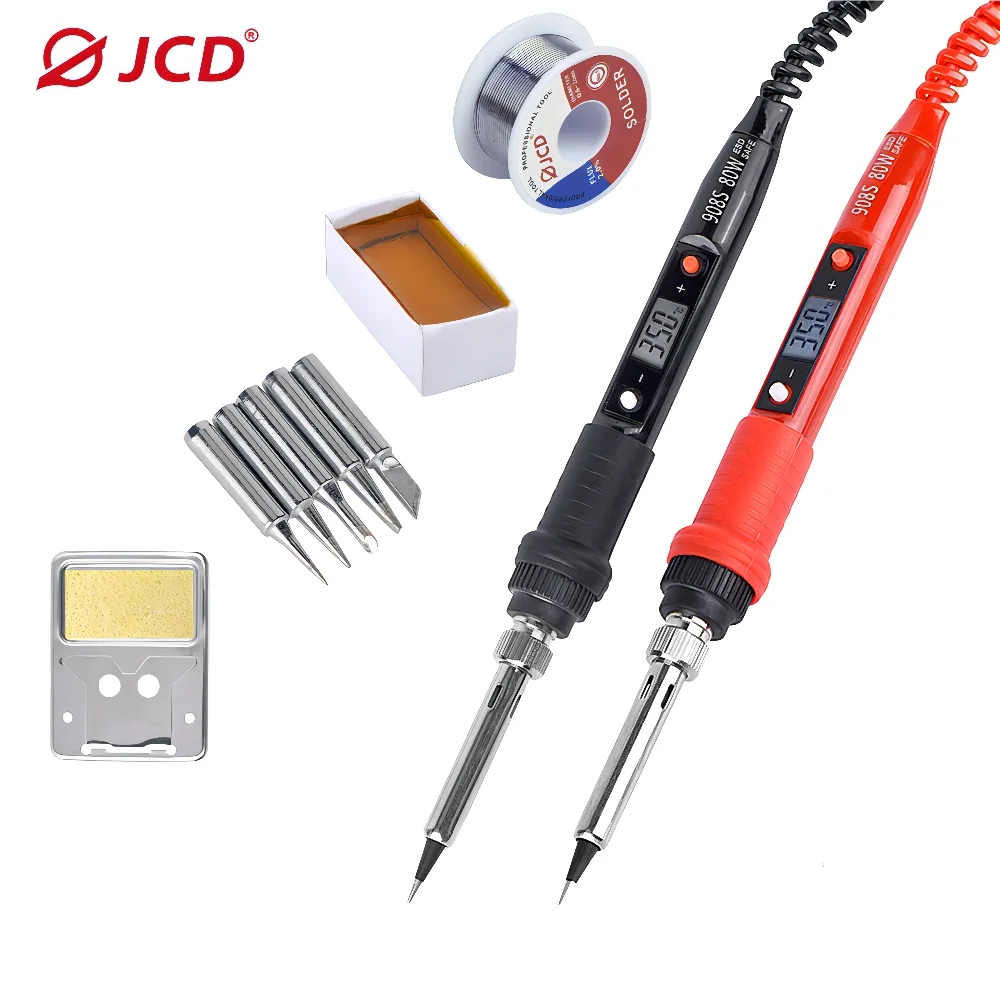
JCD Electric Soldering Iron 80W LCD Digital Display Adjustable Temperature Soldering Iron Set 220V/110V Welding Solder Tools
Return&refund policy
Eligible items are covered by return and refund support. If the item does not arrive or is not as described, the buyer can request help.
Security & Privacy
Safe payments: We do not share your personal details with any third parties without your consent.
Secure personal details: We protect your privacy and keep your personal details safe and secure.
AI offer for your market
A curated pick based on category, shipping route, delivery speed and popularity in your selected market.
Why this product fits your market
- • Estimated delivery: 5.
- • Strong customer signal: 4.8★ from 1,096 reviews.
- • Recommendations focus on this product category and your market availability.



Product specifications
Detailed product description
This product is shown with available options, market-specific pricing and verified specifications.
- Brand: JCD
- Sales: 1000+
- Package size: 15 × 10 × 5 cm
- Package weight: 0.15 kg
- Rating: 4.8 / 5
Before adding to cart, choose an available option and check the quantity.
JCD Electric Soldering Iron 80W LCD Digital Display Adjustable temperature soldering iron tips 220V/110V Welding Solder Tool 908S
Soldering iron Specifications
Voltage: AC220-240V OR AC100-130V Power: 80W
Frequency: 50Hz/60Hz
Temperature Range: 180~500℃/356~932℉
Temperature Stability: ±5℃
Heating Type: Wmore Ceramics Element
Soldering Iron Tips: 900M-B1.2 Wire Length: 1.4m / 55.12in
Soldering Iron Size: Approx.242*25*25mm/9.6*0.98*0.98in
Soldering Iron Weight: Approx.96g/3.4oz
Package Size: Approx. 254*55*35mm/10*2.2*1.4n
Package Weight: Approx. 139g / 4.9oz
Instruction
Press the (+) button once to increase 1°C; press and hold it to increase temperature continuously.
Press the (-) button once to reduce 1°C; press and hold it to reduce temperature continuously.
The newly set temperature will be saved after 3 seconds,and will keep the temperature for next time powering-on.When (F) or (C) symbol flashes, it means the heating core has not reached the set temperature.Temperature Calibration
1. After 60 seconds of power on, put the soldering tip on a thermometer,and a moderate amount of solder on the soldering tip; make the test point and the soldering tip have good touch.
2. When thermometer displays a stable temperature (about 2 seconds),write down the temperature.
3. Move soldering iron away from thermometer; press the (-) and (+) button at the same time to enter temperature Calibration.
4. Input adjustment quantity. Adjustment quantity=set temperature - measured temperature (see example)
5. Press the (-) and (+) at the same time to exIt temperature interface, finished.
Example 1, when setting temperature is 350°C while measured temperature is 342°C, the correction steps are as follows
a. press the (-) and (+) at the same time to enter temperature correction intertace.
b. press the (+) button till the LCD displays 8 °C
c. press the (-) and (+) at the same time to exit
temperature correction intertace Example 2, when setting temperature is 350°C while measured temperature is 330°C,the correction steps are as follows
a. press the (-) and (+) at the same time to enter temperature correction interface.
b. press the (-) button till the LCD displays -20°C
c. press the (-) and (+) at the same time to exit temperature correction
interface
Parameter setting
1. To press the red and white button both at the same time before it is power on, power on,after the LCD is working, stop to press the button, you will enter the setting menu. The LCD shows (F) or (C)
2. Press the white button to choose C(degree centigrade) or F(Fahrenheit).Press the Red button to choose Element U10(01), U20(02), U30(03), U40(04).
3. Pressing the (- ) and (+) at the same time to save your setting operation and quit the setting menu (finished) To protect the user from scald, when on the setting menu, it will stop heating. Failure warning indication The LCD shows (OP): the heating element is open circuit.
Solution: 1. Unplug the soldering iron. 2. Close the interfering source. 3. To use it far away from the interfering source.
Note
Please do not touch the soldering tip and tube when the power is turned on.